My neighbor had a barbecue the other night, and I was charged with bringing dessert. I wanted to do something summery/barbecue-y and not too heavy, and thought a berry cobbler paired with french vanilla ice cream would work nicely.
This recipe from America's Test Kitchen/Cook's Illustrated (free registration required, but it's worth it) uses frozen blueberries. I had a couple bags of mixed berries in the freezer - they're cheap at Trader Joe's and I use them a lot for smoothies - and the combination of blueberries, raspberries, blackberries and strawberries worked perfectly well.
The trick to using frozen is to collect the juice that's exuded as the berries thaw and boil it down into a syrup before cooking, so the berry filling isn't too watery. You could probably get away with skipping that step - after all, there's no bottom crust to worry about sogging through in a cobbler - but you'll have to watch more closely for bubble over. And of course, you could always use fresh berries and not have to deal with the juices at all.
I did my best to speed up the thawing process by spreading the berries out on a cookie sheet in a warm oven (175°F, the lowest my oven will go) for about 30 minutes, and pouring off the juice every 10 minutes. That was the most annoying part of the preparation, so if you have time to let the berries thaw themselves in a colander, it's probably best to do that.
I also didn't have any buttermilk on hand, so I just substituted non-fat vanilla yogurt (full-fat yogurt or sour cream would have worked even better) in for the biscuit topping. The biscuit was a tiny bit dry as a result, but it was an acceptable substitution... I might also have overmixed the dough, which wouldn't have helped.
Last little tip - put a cookie sheet under the pan while baking, just in case. I got a little bit of bubble over despite having reduced the juices a lot.
The finished product was very tasty; the flavors of the berries were highlighted by just a little cinnamon, salt, and VERY fresh lemon zest and juice (from the neighbor's tree... yet another reason I love living in California!) and the biscuit topping held up well to the berry filling. It was more work than I thought it would be to reduce the juices, and this recipe was definitely not the 'quick and easy dessert' I had sort of hoped it would be. I'd suggest to wait for fresh berries and save the thawing/juice reducing steps, but if you're craving a summery treat in the dead of winter, it might be worth the effort.
Friday, May 04, 2007
Year-Round Summer Berry Cobbler

Thursday, February 08, 2007
Mmm...chocolate!!!
Okay, so it's winter, and nobody likes to go out. What to do, what to do? I have a solution! Make these delicious Milk Chocolate Brownies, from the Feb 2007 issue of Gourmet
1 stick (1/2 cup) unsalted butter
8 oz fine-quality milk chocolate, chopped
3/4 cup packed light brown sugar
1 teaspoon pure vanilla extract
2 large eggs
3/4 cup all-purpose flour
1 tablespoon unsweetened cocoa powder
1/2 teaspoon salt
1/4 teaspoon baking powder
Put oven rack in middle position and preheat oven to 350°F. Butter and flour a 9-inch square baking pan.
Melt butter and half of chocolate in a 1 1/2-quart heavy saucepan over low heat, stirring, until smooth. Remove from heat and cool to lukewarm. Stir in brown sugar and vanilla. Add eggs 1 at a time, beating well after each addition, until mixture is glossy and smooth.
Whisk together remaining ingredients, then stir into chocolate mixture. Stir in remaining chocolate.
Spread batter in pan and bake until a wooden pick or skewer comes out with a few moist crumbs adhering, 25 to 30 minutes.
Makes 16 brownies.
I used Ghiradelli milk chocolate, bought at Trader Joes in a big chunk. I got to use my kitchen scale to measure the 8oz of chocolate, and took great pleasure in taking out exactly half--yes, I am a geek! But one with good brownies!
I baked them for 25 minutes--the top got very crispy, but the inside was quite gooey--I did not, however, move the oven rack down to the middle position. So perhaps the top will get less done looking if you do so. However, my roommate and I are not picky about how done brownies are, and gooey is always good, so we were happy. I didn't skewer them to check for doneness (I thought one wasn't supposed to do that with brownies anyway?) but all was well. I highly recommend them to anyone!
Thursday, January 04, 2007
Mom mom's Snickerdoodles

To prepare the cookies:
In a large bowl, mix together:
1 cup soft shortening (part butter)
1 1/2 cup sugar
2 eggs
In a smaller bowl, mix together:
2 3/4 cup gold medal flour
2 tsp cream of tartar
1 tsp baking soda
1/4 tsp salt
Add the dry ingredients to the wet ingredients a little at a time and mix together.
At this point you can either chill the dough or get right to baking the cookies. My grandmother preferred to chill them. It will make it easier to roll the dough into balls without it getting sticky.
Roll the dough into balls the size of a small walnut (about one inch) and roll in the following mixture:
2 tbsp sugar (I found another recipe on the Betty Crocker website for Holiday Snickerdoodles HERE. I experimented making green ones which can be seen in the photo. However, you could use any color sugar to tailor the cookies to any occasion.)
2 tsp cinnamon
Place the dough on an ungreased baking sheet about two inches apart.
Bake at 400 degrees until slightly brown but still soft (about 8-10 minutes). They will probably be done before they look done. I made the mistake of over-cooking my first batch. They will puff up at first and then flatten out.
This recipe makes about 5-6 dozen cookies. Enjoy!
Monday, October 30, 2006
Apple chunk coffee cake
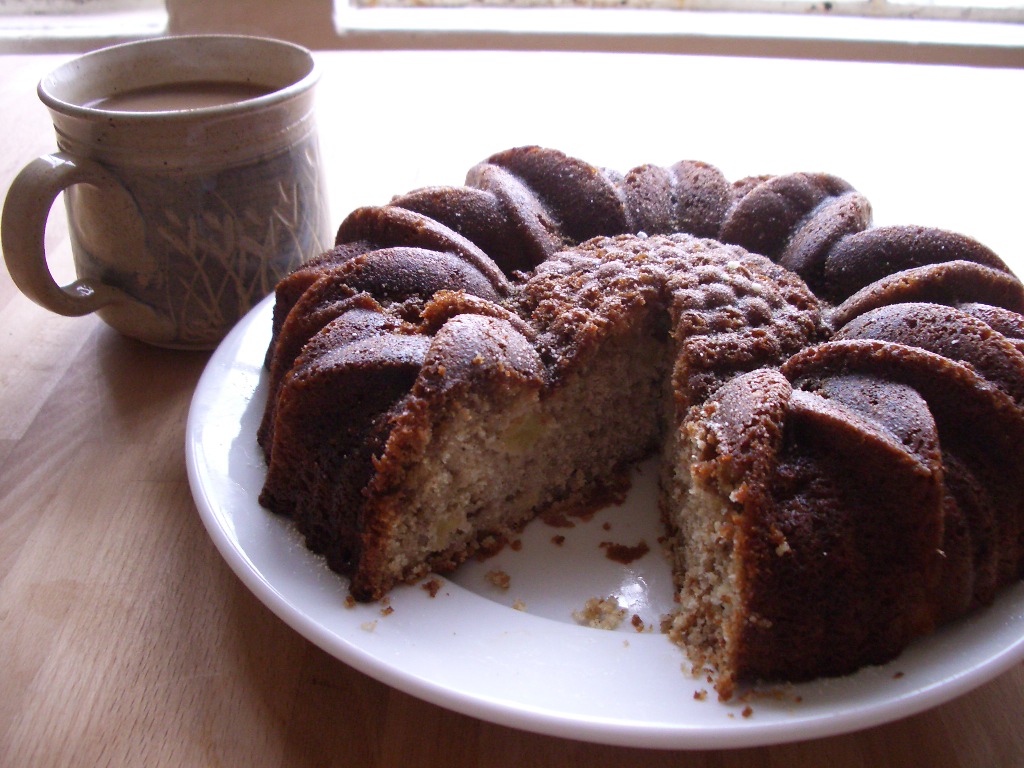
Something about October makes me buy several pounds of apples every time I go to the grocery store. I don't know if it's nostalgia for my childhood, when my family would go apple picking, bring home three bushels of apples and just bake bake bake for the next week straight, or if I just really like apples. Either way, I've been looking for new ways to cook them. This one is adapted from a recipe in "The Apple Lovers' Cookbook" and it came out beautifully. It's moist, a little crumbly, and perfect for breakfast, snacking or even dessert. Plus, it gave me an excuse to use the sunflower bundt pan that I got for my wedding.
Ingredients:
1 c. sugar
1 c. vanilla yogurt (can substitute sour cream)
1/2 c. butter
2 eggs
2 c. flour
1 tsp. baking powder
1 tsp. baking soda
1/2 tsp. salt
1/2 tsp. cinnamon
1/4 tsp. nutmeg
1/4 tsp. allspice
1 tsp. vanilla
2 1/2 c. chopped apples
----
1/2 c. brown sugar
1 tsp. cinnamon
2 Tbsp. butter
1/2 c. chopped walnuts (optional)
Directions:
Preheat the oven to 350°F, and grease and "flour" (use confectioner's sugar to avoid a floury exterior for your cake) a bundt pan. Beat together liquid ingredients (sugar through eggs) until most chunks of butter have disappeared. Sift together the dry ingredients (flour through allspice) and add them to the wet mix. Mix until all the dry ingredients are moist, then add the vanilla. Beat another 2 minutes, scraping sides of bowl often. Fold in the apple chunks.
Prepare the streusel by combining the butter, cinnamon and sugar (just use your hands for this) until crumbly. Add in the nuts, if desired (I didn't).
Spread about half the batter into your prepared pan. Layer with the streusel, leaving the outer 1/2 inch or so bare, and then top with the rest of the batter. Bake for 40-50 minutes, or until a toothpick inserted at the fattest part of the cake comes out clean. Cool in pan for 15 minutes at least, then invert on a serving plate. Sprinkle with powdered sugar just before serving, if desired (the cookbook suggests a glaze of 1 c. confectioners sugar, 1/2 tsp. vanilla and 3 tsp. milk, but that seemed like overkill to me). Makes 12-16 servings.
Tuesday, August 15, 2006
Thai night
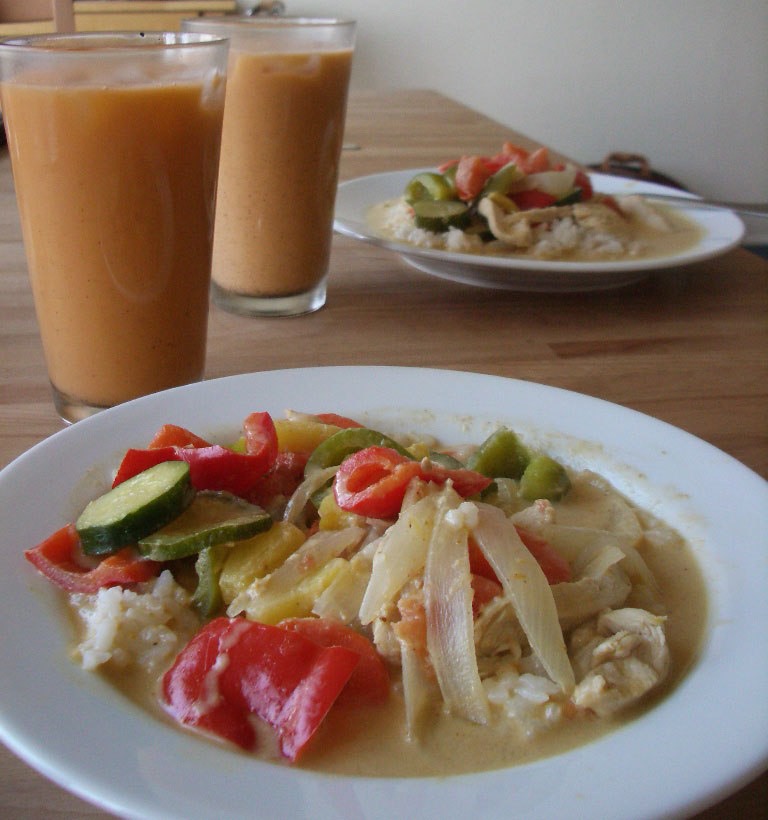
One of my favorite 'go-to' recipes is this Yellow Chicken Curry. We decided to take it a step further and have Thai iced tea with dinner... and then tried our hand at Mango with Sticky Rice for dessert.
The curry is a pretty straightforward stir-fry like recipe... the ingredients list is pretty long, but it is not complicated to make. Most of the ingredients can be found at a regular grocery store, but if you have a hard time finding fish sauce or curry paste, look for an asian grocery in your area.
1 medium onion
1 large carrot
1 green and 1 red bell pepper
2 medium tomatoes
1 zucchini
[you can add/substitute almost any vegetable, but the bell peppers and onions are essential]
1 Tbsp. vegetable oil
1 Tbsp. grated fresh ginger
3 Tbsp. yellow curry paste [NOT curry powder!]
1 x 13.5oz can of coconut milk
3/4 c. chicken broth
2 Tbsp. fish sauce
1 Tbsp. sugar
2 medium chicken breasts, sliced thinly
pineapple, to taste
handful Thai basil (optional)
Slice the vegetables into large-ish chunks. Heat the vegetable oil in a large, heavy pot (we use a 5.5 qt Le Creuset) over medium heat. Sautee the onion, peppers and carrots about 3 minutes, until onions are almost translucent. Add the finely grated fresh ginger [we freeze our knobs of ginger, which helps them keep longer and also makes them easier to peel and grate] and yellow curry paste; stir and cook 2 minutes. Pour in coconut milk, chicken broth, fish sauce and sugar, stir together. Add the chicken to the pot and cover with liquid. Cook 5-15 minutes, until the chicken is cooked through and the sauce has thickened a bit. Serve over rice or another grain of your choice.
As for the Thai Iced Tea, you can purchase it like any other flavored loose-leaf tea. Brew strong, pour over ice, and add plenty of sugar and cream. If you can't find the tea, you can try to make your own with black tea and spices.
Sticky rice is prepared a little bit differently than the normal rice. Soak 1 c. of short grain rice in about 1 1/2 c. of water for one hour. Drain onto a clean tea towel set in a colander. Steam the rice 20 minutes. While the rice is steaming, combine 2 Tbsp. sugar, 1 c. coconut milk and a pinch of salt; heat together (in 15 second intervals in the microwave) until the sugar is entirely dissolved. Remove the rice to a bowl - it will be pretty dry - and pour about 3/4 c. of the coconut milk mixture over the rice. Allow the liquid to soak in (about 5 minutes). Spoon onto the serving plate (makes about 3-4 servings) and top with the remaining coconut milk. Serve with mango on the side. The rice texture is a little hard, so if you prefer your rice softer, you might make a little more coconut milk/sugar and a larger volume soak in.
Tuesday, July 11, 2006
Very Cherry Brownies - an experiment
 I got all excited in the grocery store earlier this week when I saw a huge bag of cherries at some ridiculously low price. After eating quite a few of them as-is, I realized I'd have to do something with the rest before they went bad, and gorging myself on a half pound of cherries wasn't an option. I really kind of wanted to make something cheesecake-y, but we had neither cream cheese nor sour cream on hand, so I just made some brownies instead.
I pitted and halved the cherries (about 3 1/2 cups total) during the 4th-6th innings of Sunday's Red Sox game, about an hour total. Not bad given that I was just using a paring knife - played around with technique a bit and determined it was easiest to slice around the pit, twist the halves apart, and then twist the pit out of the half it stuck with.
After pitting, I coated the cherries with about 1/4 cup of sugar and let them sit for more or less the remainder of the game - which went to 19 innings, so almost 3 hours - stirring occasionally. This got a lot of liquid out of the cherries, which I later drained into a saucepan, and reduced to a syrup (boiled on medium heat until thick) to drizzle on top of the brownies.
I doubled a basic brownie recipe from a Cooking Light cookbook [normally I'd go with a richer brownie, but I've been making a lot of sweet/fatty foods lately]; spread half the batter into our new-ish quarter sheet pan (13"x9"), layered on the cherries, spread the rest of the brownie batter over them, topped with the cherry syrup, and then baked.
I was kind of skeptical of the Cooking Light brownies. They came out chocolatey, fudgy and moist, but I'm sure the moistness was at least partly due to all the cherries and cherry juice. I wouldn't say I absolutely *love* these brownies, but I haven't had much of a problem eating them. I like the idea of them, though, and am curious to try it (or something similar) with a different brownie batter. Anyone out there got an AMAZING brownie recipe they're willing to share?
[this is the doubled recipe, can be halved to make an 8"x8" pan of brownies]
2 egg whites
1/2 c. margarine [I used butter]
1 1/2 c. sugar
4 Tbsp. water [this is why I was skeptical of the recipe]
4 tsp. vanilla extract
2 eggs
1 1/2 c. AP flour
1/2 tsp. baking powder
1/4 tsp. salt
2/3 c. unsweetened cocoa powder
Beat egg whites at high speed until stiff peaks form. Set aside in a separate bowl. [folding the egg whites into the batter at the end of the recipe gives you a lighter texture... a little odd for a "fudgy" brownie recipe?]
Cream together margarine and sugar, add water, vanilla and eggs (one at a time) and beat until fluffy.
Sift all dry ingredients together in a bowl (this is especially important for the cocoa, which tends to clump quite a bit) and stir loosely into the egg mixture. Fold in the egg whites.
Transfer the batter into a 13"x9" buttered and floured pan and bake at 350°F for 25 minutes.
One last note: While looking for something to do with the cherries, I came across a couple really, er, interesting recipes. I almost want to make this Cher-Rhuba-Chini Pie (cherries, rhubarb and zucchini mixed together in a gelatin base, with a brown rice pie crust) out of morbid curiosity. Shrimp and Cherry Quinoa, on the other hand, looks unique but still tasty, very sort of Iron Chef.
Tuesday, July 04, 2006
Quick and light July 4th dessert

I've noticed a lot of patriotically themed desserts popping up all over the cooking blogosphere... JustHungry offers up a variation on Eton Mess with balsamic strawberries (!), blueberries, star shaped cookies and merengues; Slashfood gets retro creative with Jell-O and Cool Whip, and Coconut & Lime went with a baked good, whipping up a cranberry-blueberry bread.
My submission is decidedly easy, and very light - we had it for breakfast, actually, but it would be the perfect thing to satisfy a sweet tooth after going for one too many hamburgers and hot dogs! Just scoop a little non-fat or low-fat vanilla yogurt into a bowl, slice some strawberries on top, sprinkle on some blueberries, maybe give 'em a stir, and you're good to go. Of course, you don't have to stick to strawberries - any red berry will do - but to me there's nothing better than a nice ripe strawberry in vanilla yogurt.
Monday, July 03, 2006
Birthday Boston Cream Pie
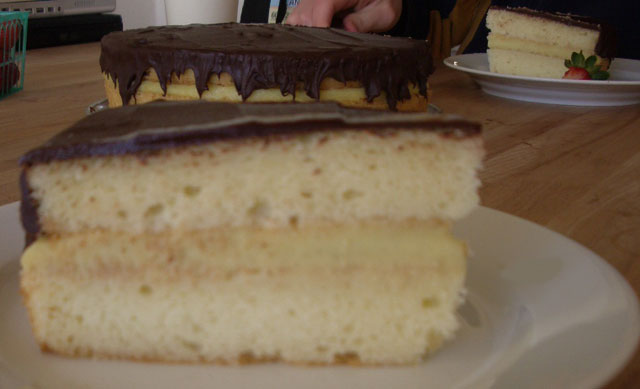
A couple years ago, my husband (then boyfriend) asked me if I would make him a Boston Cream Pie for his birthday. My attempt - in the 90°, 99% humidity weather of a typical Massachusetts July, was less than successful. This year I tried again, with markedly better results. I fetched a Gourmet magazine recipe from Epicurious.com. Pretty basic - yellow cake, a custard filling (very similar to the pastry cream that went into the berry tart, actually) and a chocolate glaze for the top.
The cake:
3/4 c. unsalted butter
1 1/4 c. sugar
1 tsp. vanilla
2 eggs
2 c. cake flour [using cake flour, which is lower in protein than all-purpose, gives you a more tender cake]
2 1/2 tsp. baking powder
1/2 tsp. salt [omit if using salted butter]
3/4 c. milk
Cream together the butter, sugar and vanilla (with a hand or stand mixer) until fluffy. Add the eggs one at a time, beating until smooth after each addition. In a separate bowl, sift together the cake flour, baking powder and salt. Add the dry mixture to the butter mixture in about three portions, alternating with addition of milk. Pour equal amounts of batter into two greased and floured 9-inch round cake pans, and bake at 350°F for about 30 minutes (or, use one 9" springform pan and bake for 50-55 minutes). The cake should be golden with brown spots on top when done; check to make sure that a toothpick comes out clean. Let cool in the pan on a rack at room temperature for about 20 minutes before removing the cake from the pan [see assembly tips below].
The custard:
3 Tbsp. cornstarch
1/3 c. sugar
1 c. milk
3 eggs
1/2 c. heavy cream [you could use 1 1/2 c. half and half in place of the milk and heavy cream]
1/4 tsp. salt
1 vanilla bean, split lengthwise and with seeds scraped out [or add 1 tsp. vanilla at the end]
3 Tbsp. unsalted butter
The original recipe instructions are to whisk together all ingredients but the butter in a saucepan, bring to a boil over medium heat and continue whisking about 2 minutes until thick. Then remove from heat, remove the vanilla bean pod and whisk in the butter.
I chose to use the slightly more complicated method described in the tart recipe - combining the cornstarch, eggs and about 1/4 c. of cream; boiling together the rest of the ingredients (except the butter). Then take 2 Tbsp. of the boiling cream/sugar mixture and add to the eggs, whisk, strain, and then add the strained egg/cornstarch to the pan. Apparently, adding a bit of the boiling cream to the eggs will cause some undesirable bits of the egg to coagulate, which you can then strain out; this gives you a smoother custard than just boiling it all together.
Whichever method you choose, transfer the custard to a cool bowl and cover directly with a piece of plastic wrap to prevent a skin from forming. Let cool to room temperature before assembling.
Chocolate glaze: [It's easiest to make this after you've assembled the rest of the cake; see assembly notes.]
6 oz bittersweet or semi-sweet chocolate, broken into pieces
3 Tbsp. milk or cream
2 Tbsp. unsalted butter
1 1/2 tsp. light corn syrup
1/4 tsp. salt
Melt all ingredients except the milk/cream together in a double boiler/bowl over simmering water. I don't have a double boiler, so I used an old metal cake pan that happened to fit perfectly over my saucepan. The important thing here is to not let any steam escape from the pan of water - if any water mixes with the chocolate, the chocolate will seize and be gross. Add the milk/cream a little bit at a time until you reach a good pourable-but-not-too drippy consistency - 3 Tbsp. should be about right, but it's best to be a little cautious.
Assembly notes:
I was very lucky in that both my cake layers came out very cleanly and pretty flat, so I didn't have to do any trimming. I also had the bottoms of two springform pans to help me with the assembly - one to use as a platform for the cake and another to provide a nice surface to turn out the cakes from their pans. If you don't have springform pans, you can cut a circle out of a clean, sturdy cardboard box to serve a similar purpose.
Put the first cake layer right side up on your serving platter. Using a spatula, scoop ALL the custard onto the cake layer, making a big glob in the middle of the cake. Spreading from the middle makes you less likely to pick up crumbs, etc. Spread this evenly to about 1/4 inch from the edge of the cake - it will squirt out a little bit when you put the second layer on. Then, place the second cake layer, upside down (this gives you a flat top) on the custard; it's ok if you don't get it perfectly centered, you can just wiggle it into place.
Finally, prepare the chocolate glaze, and spoon on top in the same way you did the custard to avoid getting crumbs in the glaze. Boston Cream Pie is nice because you don't really have to frost the sides (which is a pain), you can just let the glaze drip artfully down the edges. Stick the cake in the fridge for a little bit so the chocolate will set up, or serve right away.
I was very excited at how well this cake turned out. The cake layers were tender and not too dense; the custard was delicious and at the perfect consistency (although, okay, using a whole vanilla bean probably wasn't necessary), and the chocolate topping was not too overpowering. Best of all, it tasted JUST LIKE a Boston Cream Pie! If I make this again, and I probably will - this seems like it might become a birthday tradition - I might make a 1 1/2 or double batch of the custard so that layer will be more substantial. But it's definitely wonderful as-is.
Tuesday, June 20, 2006
Summer berry tart

From Rose Levy Beranbaum's excellent and much-loved Pie and Pastry Bible: "When fresh berries are at the peak of their season, this tart is the time-honored way to make the most of them." Well, Rose Levy rarely steers me wrong, so I decided to give her Fresh Berry Tart a shot this weekend.
The tart has three components: a sweet cookie shell, a creamy (think eclair) filling, and of course, the berries. I'd suggest making the pastry cream first, then prepare the shell while the cream is cooling. The recipe suggests that you assemble shortly before serving, but we've had the tart in our fridge for a couple days and it's been fine - it's delicious, so you probably won't have to worry about it keeping more than 48 hours. :)
Pastry cream
2 large eggs
3 Tbsp cornstarch
2 c. half and half
1/2 c. sugar
pinch salt
1 tsp. vanilla extract
1 Tbsp. unsalted butter
Whisk together the eggs and cornstarch until cornstarch is dissolved and mixture is smooth. Add 1/4 c. of half and half and whisk together. Set aside. Prepare a small bowl with a strainer set over it, next to your stovetop.
In a heavy saucepan, combine sugar and 1 3/4 c. half and half. Over medium heat, bring to a full boil, stirring occasionally. Whisk about 2 Tbsp. of the boiling mixture into the egg, and then pour the egg mixture through the strainer into a new bowl. Prepare a medium sized, clean bowl and have plastic wrap out as well before continuing to the next step.
Bring the mixture in the saucepan back to a boil, and quickly add the egg mixture, whisking rapidly. Whisk together about 20-30 sec, making sure to scrape the corners of the pan - at this point the mixture will become extremely thick (it's pretty cool, actually. Like chemistry!) Remove the pan from the heat and whisk in the butter and vanilla extract. Once everything is well incorporated, scrape the mixture into your clean bowl and put a piece of plastic wrap directly on the surface of the filling - this prevents a skin from forming.
Allow to cool to room temperature (about one hour) and then refrigerate until cold and firm.
Sweet Cookie Tart Crust (make this while the pastry cream is cooling)
8 Tbsp. (4oz.) cold butter, cubed
1/4 c. sugar
1 1/2 c. (50g) AP flour
pinch salt
1 egg yolk
2 Tbsp. heavy cream
Combine flour and salt in a small bowl. Whisk together egg yolk and cream in another small bowl. Using food processor, pulse butter and sugar together about 15 times, until sugar disappears. Add the flour and salt, pulse another 15 times; the butter chunks should be about the size of small peas. Add the yolk and cream mixture to the food processor and pulse until just incorporated, about 8 times. [Alternately, you can combine all the dry ingredients and cut in the butter with a pastry cutter or pair of knives, then mix in the wet ingredients.] The dough will still be quite crumbly but should stick together if you pinch it between your fingers.
Transfer the dough to a large sheet of plastic wrap and shape it into a flat, 6 inch disc. Wrap well and move to freezer for about 10 minutes, or until firm enough to shape. While the dough is chilling, preheat your oven to 400°F, and butter and flour the sides of a 9 1/2 inch tart pan.
Remove the dough from the freezer and either roll it out into a 10" circle and transfer to the tart pan, or place it in the center of the tart pan and press it out into the tart shell shape (I find pressing it into place much easier than rolling and transferring). Bake for 5 minutes at 400°, prick the bubbles out of the dough, lower the temperature to 375°F and bake 12-15 minutes more (until golden). Remove from oven and allow to cool.
Assembly
Once the filling and tart shell have cooled sufficiently, spread about 2 c. of the filling into the tart shell. Top with 3-4 c. berries - as much as you can possibly add without them falling off! Chill until ready to serve.
Notes
We used a 1:1:2 ratio of raspberries, olallieberries and blackberries. If you want a nice glaze, heat up about 1/4 c. preserves (we used apricot but almost any kind will do) in a microwave or on the stovetop and brush delicately onto the berries. If you don't have preserves, you could make a simple sugar syrup (boil together 1 Tbsp. sugar and 1 Tbsp. water) and use that as a glaze.
The tart was very tasty - the pastry cream was phenomenal, especially paired with our very ripe berries. The only downside was that it took quite a while to make, between cooling the pastry cream and pressing out the dough... doesn't mean I won't make it again, though! One bonus I wasn't expecting - the recipe for the pastry cream makes about a half cup too much for the tart. So if you have left over berries, or a pint of strawberries, you could just eat them with the cream!
Friday, June 16, 2006
Balsamic Strawberries
I was bored tonight and wanted something sweet. After Jackie's post about in-season produce I remembered that I had strawberries to eat, and I thought of making a strawberry sauce for ice cream or frozen waffles. Then I got the idea that balsamic vinegar would be good with it too, so I looked for a recipe for balsamic strawberries and found a simple one on www.epicurious.com.
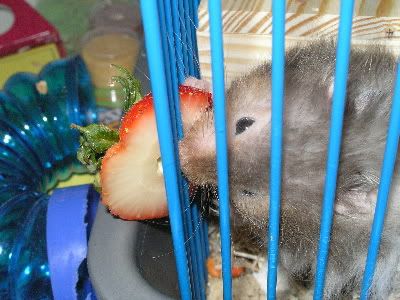
3 1/2 cups sliced hulled strawberries (about 16 ounces) since it's just me tonight, I made about half this. I cut off the tops and fed them to my hamster
1/4 cup sugar 2 Tablespoons-ish
1 1/2 tablespoons balsamic vinegar 1-ish Tablespoon
Toss all ingredients in medium bowl. Let stand at room temperature until juices form, at least 1 hour and up to 3 hours. I did a little over an hour
Makes about 3 cups. one and half cups
This was delicious! Sweet and tangy and awesome. I tried to take some decent pictures. I served it over a frozen waffle and some vanilla ice cream.
Combining in the bowl.
Plated.