Showing posts with label holiday. Show all posts

Thursday, January 04, 2007

Mom mom's Snickerdoodles


When I was young I used to make these cookies with my grandmother before Christmas. She passed away 11 years ago and I still make them to bring back happy memories.
They make great Christmas cookies, but they are delicious and could be made for any occasion.
I'd always thought that this was a Super Secret Family Recipe but upon doing some research I discovered that it originally came from the back of a Gold Medal flour bag. A very similar recipe can be found at the Betty Crocker website HERE
. The recipe there differs in shortening/butter content but I use the version that my grandmother wrote on a 3X5 index card.

To prepare the cookies:

In a large bowl, mix together:
1 cup soft shortening (part butter)
1 1/2 cup sugar
2 eggs


In a smaller bowl, mix together:
2 3/4 cup gold medal flour
2 tsp cream of tartar
1 tsp baking soda
1/4 tsp salt


Add the dry ingredients to the wet ingredients a little at a time and mix together.

At this point you can either chill the dough or get right to baking the cookies. My grandmother preferred to chill them. It will make it easier to roll the dough into balls without it getting sticky.

Roll the dough into balls the size of a small walnut (about one inch) and roll in the following mixture:
2 tbsp sugar (I found another recipe on the Betty Crocker website for Holiday Snickerdoodles HERE. I experimented making green ones which can be seen in the photo. However, you could use any color sugar to tailor the cookies to any occasion.)
2 tsp cinnamon

Place the dough on an ungreased baking sheet about two inches apart.
Bake at 400 degrees until slightly brown but still soft (about 8-10 minutes). They will probably be done before they look done. I made the mistake of over-cooking my first batch. They will puff up at first and then flatten out.

This recipe makes about 5-6 dozen cookies. Enjoy!

Read More...

The Last Meal of 2006: Turducken

For New Year's Eve dinner, we planned to order a Turducken from the Food Network-approved Cajun Grocer website. However, the cost of the beast plus shipping, turned out to be rather high, so my friend and I decided to make our own. It was an intimidating undertaking, but we succeeded. The finished product absolutely justified the several hours of prep work. Here's how we did it.

Ingredients:
1 whole chicken (3-4 pounds)
1 whole duck (5 pounds)
1 whole turkey (12 pounds)

1 pound of pork sausage
4 boxes of Jiffy cornbread, prepared according to package
~ 1.5 cups broth (any kind will do)
chopped fresh sage, about 10 leaves

salt & pepper
olive oil

Equipment:
large roasting pan with handles
butcher's twine
3 skewers (wood ones need to be soaked in water overnight)
meat thermometer (ideally a digital probe)

The day before you plan to serve the Turducken, de-bone all three birds. This site has easy-to-follow instructions and simple diagrams. You'll need a sharp knife; kitchen shears and a co-cook also are really helpful. Begin with the chicken, especially if you're a novice at de-boning poultry: the chicken is in the middle of the Turducken, and no one will be able to see if you've made a mess out of the meat/skin. The chicken is also the easiest to manipulate, and it doesn't take much to pop its joints. Wrap the de-boned carcass in plastic wrap, and move on to the duck. Be forewarned that the duck is a bit greasy.

The de-boned duck will look like this:
>By now, you've de-boned two birds, so you'll be feeling pretty comfortable with the poultry anatomy by the time you get to the turkey. Take care not to break through its skin, as the turkey holds the whole mess together. *Do NOT remove the drumsticks and wings from the turkey.

Once you've finished preparing the birds, go ahead and make some cornbread. We simplified the situation by using only cornbread stuffing in our Turducken, instead of the 3 kinds the Paul Prudhomme uses in his epic recipe. We used four boxes of Jiffy cornbread mix, which produced two good-sized loaves.

This is about all you can do the day before. Do not pre-assemble the Turducken, the stuffing will get contaminated with bacteria by sitting in raw meat overnight.

The day you plan to serve the Turducken, start by making the stuffing. Brown the pork sausage in a skillet (do not drain off the fat), mix with cornbread pieces, sage, and enough broth to moisten the bread and bring it all together. Season with salt and pepper.

Preheat oven to 300 degrees.

To assemble the Turducken:

Lay out the turkey carcass, open and skin-side down:Season the cavity with salt and pepper.

Spread the stuffing evenly over the cavity. Lay the duck carcass on top, skin-side down.

Season the cavity with S&P, spread stuffing evenly over the duck.

Lay the chicken carcass over stuffing, skin-side down.

Spread stuffing over the chicken. Bring up the sides of the chicken, seal with a skewer. Bring up the sides of the duck to cover the chicken, skewer closed.

Repeat with the turkey. Secure the bird bundle with butcher's twine and remove all skewers.

It is now officially a Turducken!

Place Turducken in the roasting pan so that it is seam-side down and breast-side up. Season with salt and pepper, drizzle with a little olive oil. Cover the Turducken loosely with tinfoil to prevent over-browning.

Roast at 300 degrees for about 4 hours, or until the meat thermometer shows the internal temperature at 165 degrees. When it reaches about 140 degrees, remove the tinfoil to nicely brown the skin. Remember to baste it occasionally, about every 30-45 minutes.

After removing the Turducken from the oven, LET IT REST for at least 30 minutes before carving. Slice across the breast to show off those pretty layers:
The pan drippings and browned bits in the roasting pan make an excellent gravy, so just go for a simple flour/fat/water version, made right in the roasting pan on the stove.

This makes a hearty 12-14 servings, and the total cost of the ingredients came to about $55.

So there you have it. The Holy Grail of Culinary Projects can be achieved in a New York City apartment kitchen!

Read More...

Sunday, December 17, 2006

Cranberry-ginger and orange pinwheels


These are the cookies that I made for the cookie swap I hosted this evening (it went smashingly). They turned out very well, but I'm not sure I'd make them again - I always find the rolling and cutting process pretty tedious!

Dough:
1/2 c. butter
1 1/2 c. sugar
1 tsp. orange rind
2 eggs
1/4+ tsp. cinnamon
1/4+ tsp. nutmeg
3 c. flour
1/2 tsp. baking powder
1/2 tsp. salt

Filling:
1 c. cranberries
1 c. pecans
4 medallions of candied ginger, chopped finely
1/4 c. brown sugar

Cream together the butter and the sugar until it becomes very light in color (signifying that it has become aerated), about 5 minutes. Add the orange rind and eggs (one at a time please!), then the spices, baking powder and salt. Mix until very well combined. Blend in the flour a cup at a time - if you have a stand mixer, it will probably be able to handle this fine, but if you're using a hand mixer you may need to get in there with your hands to combine the last half cup or so. Divide the dough into two portions and put it in the fridge for at least an hour (we chilled ours overnight).

While the dough is chilling, prepare the filling (hey, that rhymed!). If you have a food processor, just throw all the ingredients in there and process until it's all chopped up. If not, mix everything together in a bowl and use your blender to do it in two or three batches.

Roll out one half of the dough into a 1/4" thick rectangle (about 10"-12" on the long side) on top of a piece of parchment paper or a flexible cutting board. Spread half of the filling on the dough, leaving an inch of dough on each long side and one of the short sides. Then, using the parchment paper, roll up the dough starting at the spread short side. Pinch off the ends and roll the dough in a sheet of plastic wrap, then pop it back in the oven, this time for at least four hours (!)

Once the dough has chilled - it should be super firm at this point - use a sharp knife to slice into 1/4" cookies. You should try to rotate the roll after every few cuts so you don't smush it on one side. Bake 8-15 minutes (depending on thickness) at 375°F.

And just for fun, here's the rest of the spread, post-party:

Dee-lish!

Read More...

Thursday, December 14, 2006

Turkey pot pie


I know it's a little late to be talking about Thanksgiving leftovers, but maybe some of you still have as much turkey meat in your freezer as we do! In my humble opinion, there are few better uses for pre-cooked poultry than this pot pie. My husband and I often make this with chicken when we've roasted a whole bird and have a lot of leftover meat.

The recipe is based on this one from Good Eats (yes, we are Alton Brown junkies) but we do it rather differently than AB. The two things that make this pot pie superior are: 1) the curry in the sauce - the flavor is not obvious but it really gives it that special something; and 2) the small number of pots and pans required to make the dish.

Ingredients:
3 Tbsp. butter
1 c. diced onion
1 c. chopped celery
2 c. chopped carrots (can substitute frozen peas for some of this, if you like, or just add up to 1/2 c.)
1 large potato, peeled and diced smallish
1 1/2 c. turkey/chicken broth or stock (which you will, of course, have made from your turkey carcass)
1/2 c. milk
3 Tbsp. flour
1 tsp curry powder
1 tsp. salt
1/2 tsp. fresh ground pepper
2 c. cubed or shredded cooked chicken
1 package Grands biscuit dough (you can make your own dough, of course, but I'm lazy).

Directions:
Melt 1 Tbsp of butter in a large saute pan over low heat. Sweat the onion and celery for about 5 minutes, until the onion becomes translucent. Add the other veggies (make sure you cut them fairly small so they'll cook quickly), turn the heat up to medium, and cook another 10 minutes. Meanwhile, heat the broth and milk together in a small saucepan (you could also do this right in a measuring cup in the microwave, on low-medium heat).

Back to the veggie pan: Scrape the veggies to the edges as best as you can and add the remaining butter. Whisk the flour and curry powder with the melted butter and let that cook for a couple minutes (this makes a sort of roux to thicken the sauce, and eliminates the flour-y taste). Whisk in the hot milk mixture and cook until thickened. Add the salt, pepper, and cooked chicken, and stir thoroughly.

Place the Grands biscuits on top (one package contains six, which makes a perfect daisy in our 12" pan) and pop the whole thing into a 400°F oven (if your pan is not oven safe, you can of course transfer the filling to a casserole dish, top with the biscuits, and bake in that instead). Bake about 25 minutes, or until the biscuits are golden brown on top and the filling is bubbling up between them. Yum!

Read More...

Monday, December 11, 2006

Caramels

Around the holidays, my family always made these caramels. The recipe was originally from my grandparents' best friends, and I grew up thinking that it was a super secret family recipe. Last year we discovered an almost identical recipe in Shirley Corriher's excellent book Cookwise. Go figure.

Candymaking can be tricky, but it's within reach if you have the right tools and a few important bits of knowledge. A trustworthy candy thermometer is key, since a few degrees in either direction can make the difference between hard candy and a nice soft caramel. A very solid pot (for even heat distribution) will make your life much easier, although my dad usually did okay with a nasty old aluminum pot.

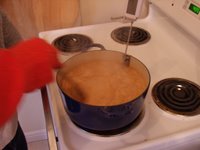
Start by buttering up a sheet pan (so you don't have to do it later). Then, melt 2 cups of granulated sugar and 2 cups of light corn syrup on medium heat. The corn syrup helps keep the granulated sugar from recrystallizing once it's melted and prevents the candy from becoming grainy. You can stir a bit at the beginning, but not once the sugar has started melting (since again, that might cause recrystallization). You also don't want too much sugar on the sides of the pot - to avoid this, put the lid on when the sugar starts steaming, and let the steam collect and run down the sides. Once the sides are clear, take the lid off and put in your thermometer. Keep the sugars on medium heat until they reach 310°F/154°C - this will take a while, but keep an eye on it from about 270° on.

While the sugar has started melting, cut 1/2 c. of butter (1 stick) into 1 Tbsp. chunks and measure out 2 c. heavy whipping cream. Once the sugar has reached 310°F, stir in the butter chunks and cream sloooowly. The temperature will drop pretty rapidly. Stir constantly (scraping the bottom and sides to fully incorporate the melted sugar) until the mixture reaches 245°F/118°C. Take the caramels off the heat and quickly stir in 1 tsp. vanilla extract (or vanilla paste). Then pour the caramel out into the buttered cookie sheet. Typically, the candy will already have started to cool by the time you're done pouring it out, so don't scrape out the sides (you might end up with a big lumpy mess on top of your nice glossy candy).

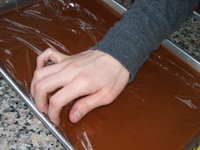
You will be tempted to lick the spoon/scrape the caramel out of the bottom of the pot right away, but trust me, you don't want to do this. It's still over 200°F and it will burn the hell out of your tongue. So, let it cool a little bit (or, my personal favorite - put a scoop of vanilla ice cream in the pot and eat it with the hardened caramel). Give the caramels 1-2 hours to harden a bit, then cover them with plastic wrap. This will prevent the caramels from absorbing excess moisture from the air and becoming too gooey. It's best to let the caramels harden for a few more hours (or overnight) before you cut them.

The easiest way to cut the caramels efficiently is to turn out the whole sheet of candy (pry it out from one end with a flexible spatula) onto a sheet of parchment paper. Then, use a pizza cutter to slice lengthwise into strips and then widthwise into chunks. Wrap in rectangles of parchment paper and enjoy!

Read More...

Monday, November 13, 2006

Talking Turkey

Okay, so it's coming. One of the biggest eating holidays of the year. And the centerpiece is usually turkey. Turkey can be a tricky thing. It seems like you could cook birds of the same size for the same time and one will be dry, and the other raw. It can be tasty, but sometimes can be flavorless (a particular complaint of dry turkey). It seems confusing, no? Well, never fear, because here is a complete, easily adaptable, countless variations turkey recipe guaranteed to come out right every time. Unless your oven breaks, then I can't help you.

You will need:
A good quality roasting pan. I own this one , but any good heavy one will do.
A meat thermometer with an alert. There are lots of good ones out there.

A turkey of a size appropriate to your gathering, fresh and not frozen please!! My family gathering of 7 will happily cook a 20lb turkey, because sandwiches on Thanksgiving night is more required than tradition. All that lazing around makes you want leftovers!

Carrots, onions, and celery, 2 of each is good

chicken broth (or turkey broth, or veggie--whatever you like), 2 32oz. boxes or so.

Butter. Yes, it has to be butter. Trust me. I would recommend using a whole stick, because if you don't use the leftovers for gravy, it will taste amazing on bread.

Herbs of your choice, fresh or dried is not terribly important. These will be mixed with the butter.

About an hour before you cook, take the turkey out of the fridge. Wash it inside and out, pat it dry inside and out, and salt and pepper it. Place it on the roasting rack in the pan, and let it sit at RT for an hour. Use this hour to preheat the oven to 450. About 30' beforehand, soften some butter, and mix into the butter whatever herbs you'd like to flavor your bird with. I like using fresh thyme, or a mix of rosemary, thyme and garlic. If you are using fresh and NOT stuffing the turkey, place some sprigs of herb in the cavity. Carefully (VERY carefully) slide your hands in between the skin and breast of the bird, and loosen the skin. Generously rub the herb butter over the breast meat. Leaving pieces is OK, just don't shove chunks in and leave it. You want to get all the meat. This will take 4-6T of butter total, depending on bird size. Put a little butter on the skin of the bird if you like crispy skin; if not, leave it. Cut up your veggies, and scatter them in the roasting pan. Add enough broth just to cover the veggies; I would use about a box and a half of broth for my roasting pan, but once again, this is dependent on size.
Now, insert the meat thermometer into the thickest part of the thigh, but DON'T TOUCH THE BONE (that is so important--ask me how I know). Try going parallel to the bone. Guidlelines say that the bird is DONE when the leg reaches 185 degrees, so you want to set your thermometer to go off when the meat reaches 175 degrees. Yes, you heard correctly. We'll get to this.

By now your oven should be fully preheated. Open it, and slide the bird in. Make sure (before you do the sliding) that your only rack in there is in the bottom 1/3 of the oven. Cook at 450 for 30'. After 30', turn the oven down to 350, and cook until the temperature alarm goes off. As a time estimate, an unstuffed bird takes about 12-15' per pound, and a stuffed one takes 18-22' a pound. This is also dependent on your oven--my mom's pretty shiny new oven cooked the turkey an hour faster than predicted. So time is an estimate only! Do not open the oven to baste the bird--this only lets heat out and makes the skin soggy. Only open the oven for two reasons: 1) the pan is getting dry and you need to add more broth, or 2) the turkey is browning faster than you like, so you need to tent it with tinfoil. NO BASTING!!
Once you take the bird out, pick up the rack and move it to a plate. Turn the alarm feature off of the temperature probe, and cover the turkey with foil. The temp should continue to rise for the next 30' or so, thus ensuring the cook point of 185 degrees, but not making dry turkey!

Okay, you are now ignoring the turkey. Take the roasting pan, and pour the liquid inside into a measuring cup, or (even better) a fat separator. Let it sit for 5'. Melt some butter into a large saucepan (leftover herb butter, anyone?) and throw in some fat from the liquid in the measuring cup. Add enough flour to make a paste, and stir for 1' over medium heat. When it's thick enough, add the pan liquid (and extra chicken broth if needed/desired) into the pan. Stir or whisk for 1'. Bring to a boil, and boil until the gravy coats a spoon (meaning, it gets thick). If it's thicker than you like, just whisk in a little more broth.

When the gravy is how you want it, take it off the heat. Carve your bird as desired, and serve with the hot gravy. Oh so very good!!

Gravy variation which sound weird but is so very good:
Instead of making the butter/fat/flour roux, put some gingersnap cookie dough into the pan. Add a little broth and fat, and whisk till it's smooth. Add broth as desired. This works well with turkey seasoned with thyme and/or garlic.

Read More...

Wednesday, November 08, 2006

Cranberry Redux

Okay, so Jackie made a nice post about cranberry orange jelly, which reminded me about my absolute favourite Thanksgiving time treat (and yes, I'm including the pumpkin pie which Mom only makes twice a year). I hereby present to you a tart and textural version of Jackie's lovely recipe:

Cranberry Orange Relish:
1 large navel orange
1 16 oz. bag of cranberries

Quarter the orange. Get out the food processor (or for a very visceral experience, an old-fashioned food grinder) and pour in the cranberries--process for about 15 seconds. Add the orange quarters one at a time, blending for 10 seconds after each. This will give you a relish with lots of big pieces and bursts of flavor. You can add sugar to taste--how much depends on how sweet your orange was, and how sweet you like things in general.
You can serve this with turkey or chicken or duck, but I have a hard time not eating it all straight out of the bowl. It keeps for a long time in the fridge, and can be frozen pretty much forever. And it's also good on vanilla ice cream, for a different tasty treat!

Read More...

Monday, November 06, 2006

Cranberry-orange jelly


If you're hosting any sort of holiday gathering - or attending one where you've been requested to bring food - nothing seems to impress people more than homemade cranberry sauce. I don't know why, since it's actually really easy to make. It's also one of those things that tends to taste much better homemade. I couldn't find my fave recipe (no clue where it came from, even), so I tried to approximate it tonight. It came out very well, and just as tart as I like it!

Ingredients:
1 lb. bag cranberries (fresh, NOT dried!)
1 c. water
zest and juice of 2 medium oranges (you can leave out the zest if you don't have a grater)
2/3 c. sugar (add up to 1 c. to taste)
pinch salt
1/4 tsp. cinnamon
1/4 tsp. allspice
5-10 whole cloves (or pinch ground)
1 whole star anise (optional, but very cool)
1 1/2 c. water [replace up to a cup of this with a good red wine for more depth of flavor]

Directions:
Stir everything together in a large saute pan or medium saucepan. The cranberries should be covered by liquid. Bring to a boil. Cover and simmer (turn heat down to medium) and cook about 10 minutes; don't worry about stirring. While it is simmering, you will start to hear the cranberries popping out of their skin - you should continue to simmer until the popping stops.

Turn the heat down to low and taste. If it is too sour, add a little extra sugar at this point. Cook another 5-10 minutes with stirring - this allows some of the water to boil off and the sauce to thicken a bit. It will thicken a lot more upon cooling, but you can serve it warm if you like.

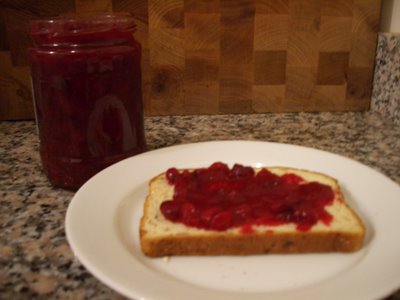
I love to eat this on toast (as pictured), as a side dish, in turkey sandwiches, or on top of a simply prepared roast chicken breast... in fact, I don't even know how long it keeps because I've never had leftovers longer than a week! This recipe should serve 6-10 as a side dish.

Read More...